
Having a party, wedding, or baby shower? You’re probably already working on a budget. With food, decorations, and maybe even a rental venue, costs add up fast. One area where you might save money—without sacrificing style—is invitations. Gorgeously professionally printed, custom invites are lovely, sure, but they come with a hefty price tag. The good news? You can certainly print invitations from home that are just as lovely—and spend much less money in the process.
Read on for a step-by-step guide to making amazing-looking invitations at home. Whether you’re having a backyard barbecue or black-tie affair, I’ll show you how to make your invitations pop—without draining your bank account.
Why Print Invitations at Home?
First of all, let’s talk about why it’s a great idea to print at home. It’s not all about saving money (although that’s a big chunk of it). With the do-it-yourself approach, you’re in charge of your design, timeline, and numbers. No shipping hassles. No extra fees for rush orders. And you can personalize every invitation down to the smallest detail.
Home printing gives you flexibility and independence that even the best-equipped print houses can’t match. It’s innovative, efficient, and rewarding—particularly when you get to witness your finished work materialize.


What You’ll Need to Start
Before diving into design programs and color palettes, make sure you’ve got what it takes. You don’t have to have a studio environment or professional-grade equipment, but having the basics does make a huge impact.
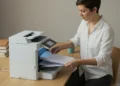
A Trusty Printer
An inkjet printer will usually work best for printing colorful invitations, especially if you’re printing them on textured or heavy paper. Look for one that accommodates custom paper sizes and borderless printing.
If you already have a laser printer, that’s fine too—just remember that coated or glossy paper will smudge unless you print on laser-compatible stock.
Quality Paper or Cardstock
Don’t skimp on this. Great paper transforms a simple design into something magical. Use:
- Cardstock (80-110 lb): Strong and stiff, perfect for formal affairs.
- Textured Paper: Gives a feel of touch—perfect for country or handmade themes.
- Matte or Gloss Finish: According to your preference; matte is classic, whereas gloss gives a shiny, modern appearance.
Tip: You will often find good-quality cardstock at the clearance section of art stores or on holiday sales.
Envelopes (Optional but Worth It)
Even if you’re hand-delivering invitations, envelopes make everything tidy and give the invitation a professional flair. Buy in bulk for a discount, or make your own out of kraft paper or recycled materials for a touch of ecogreen.
Design Like a Pro (Even If You’re Not One)
You don’t need to be a pro graphic designer to create fabulous invites. With templates and online design software, designing is easier than ever.
Tools to Try
- Canva: Free and beginner-friendly, with thousands of templates.
- Adobe Express: Great for quick editing and creative options.
- Microsoft Word or Google Docs: Basic but effective if you’re going simple.
Start with a template that fits your theme, and tweak it with your own text, fonts, and images. Want a rustic wedding feel? Try floral borders and calligraphy-style fonts. Throwing a kid’s birthday party? Go bold with color and playful icons.
Design Tips
- Keep it simple: Use easy-to-read fonts and don’t clutter.
- Stay on track: Use color and style that match your event.
- Check spelling: Come on—Triple-check before you print.
Once you’ve finalized your design, print a test page. That way, you can detect formatting issues before you waste ink or paper.
Printing Tips That Save Time and Ink
Printing at home is a breeze—but there are a few tricks for keeping it seamless and pocket-friendly.
Adjust Your Printer Settings
- Choose the right paper type: Most printers let you select “cardstock,” “matte photo paper,” or some other choice in options. This makes the ink adhere nicely.
- Print in high quality: Select the “Best” quality setting for neat text and images.
- Borderless printing: If your design is on the edges, make sure your printer supports this feature.
Print in batches
Instead of printing 50 invitations all at once, do 5-10 at a time. It avoids jams and enables you to catch errors sooner.
Let Them Dry
Wait a few minutes for each invitation to dry completely before stacking them on top of one another. Especially with inkjet printers, rushing will lead to smudges.
Budget Hacks That Really Work
Here’s how to save money without compromising the look of your invitations.
Buy in Bulk (When It Makes Sense)
Ordering cardstock and envelopes in larger quantities is usually cheaper per piece. If you’ve got more events coming up—like birthdays, holidays, or showers—it’s worth the investment.
Use Printable Templates
- Skip expensive design software. Tons of websites offer free or low-cost templates that look professional. Check out:
- Creative Market (free weekly downloads)
- Etsy (affordable themed bundles)
- Pinterest (tons of free printables)
Print Black and White
Ink that is colored can be costly. A black-and-white design with great typography is still going to be seriously classy—especially on textured or patterned paper.
Add a Personal Touch
What makes do-it-yourself invitations shine is the personal touch. You can inscribe names by hand, add a twine or ribbon wrap to each invitation, or even add small stickers or wax seals.
If you’re crafty, add some decorative shapes using a corner punch or edge trimmer. These little touches turn a printed card into a keepsake.
When to Skip DIY and Outsource
Come on: Some jobs are just better left to the pros. If you’re making hundreds of invitations for a black-tie wedding, or your home printer is just not up to the task, a local print shop can actually be a timesaver and a headache-avoider.
But for the typical small to medium-sized business, in-home printing is the optimum balance of economy, sophistication, and fulfillment.
Final Thoughts
Creating your own invitations at home is one of those life hacks that truly does sound too good to be true. It’s inexpensive, customizable, and surprisingly fun once you’ve got the hang of it. If you’re planning a birthday bash, a wedding, or just any old Tuesday gathering, you’ll be amazed at how much authority DIY holds.
You don’t need to be a professional or spend a fortune to create something beautiful. Just the right equipment, some imagination, and a willingness to try it out. So go ahead—get some cardstock, fire up that printer, and see what you can do.
You’ll most likely end up with invitations you’ll happily send out—and your guests will never be the wiser.


