Choosing the Right Photos for Canvas Conversion
They feature a wonderful mix of personal touches and artistic flair that leaves one wondering how it was all pulled together. The secret often lies in how they have turned their favorite memories into beautiful wall art. Converting photos to canvas has become one of the most popular ways to create meaningful, personalized decor that reflects a person’s life—not just what looked good in a catalog.
The biggest hurdle most people face is picking the right photos. It is a common mistake to think any photo can work on canvas, but after a few disappointing results (including a blurry vacation shot that looked great on a phone but terrible at 16×20), it becomes clear that not all images are created equal when it comes to canvas printing.
Understanding Resolution and Image Quality Requirements
The technical details do not have to be complicated, but they matter more than most people realize. Phone photos are usually suitable for canvas printing, especially if they are recent—most smartphones capture images at a high enough resolution for standard canvas sizes. A simple rule of thumb is this: if the photo can be zoomed in on a computer screen without looking pixelated, it will probably print well.
For canvas prints, an image should be at least 150 DPI (dots per inch) at its final print size. This means a 12×16 canvas needs an image that is roughly 1800×2400 pixels. There is no need to memorize these numbers, as most reputable canvas printing services will provide a warning if the image quality is not sufficient before an order is placed.

Here is what experienced decorators recommend avoiding: heavily filtered social media photos, screenshots, and images downloaded from the internet. These often look fine on screens but can appear grainy or distorted when printed large. Sticking with original photos from a camera or phone will yield the best results.
Selecting Photos That Tell Your Story
The photos that work best on canvas are not necessarily the most technically perfect shots—they are the ones that hold personal meaning. Picture this space: a canvas in a living room showing children building a sandcastle. It might not be perfectly composed, and the lighting may not be ideal, but every time it is seen, it brings back the memory of that perfect summer afternoon.
Homeowners should think about the story they want their walls to tell. Are they showcasing family milestones? Favorite travel destinations? Artistic shots that capture a creative side? The key is choosing images that will still be loved years from now. A good question to ask is: “Will this photo still bring a smile in five years?” If the answer is yes, it is canvas-worthy.
Consider the emotional impact of the photo choices as well. Action shots of kids playing, candid moments between family members, or breathtaking landscapes tend to work better than formal posed portraits. There is something about the natural, unguarded moments that translates beautifully to canvas.
Color Considerations for Canvas Printing
Canvas has a unique texture that can enhance certain types of photos while making others look flat. Experience shows that images with good contrast and rich colors tend to pop on canvas, while very pale or washed-out photos can look even more muted once printed.
Warm tones like oranges, reds, and yellows often look stunning on canvas because the texture adds depth to these colors. Cool blues and greens can work beautifully too, especially in nature shots. What decorators try to avoid are photos that are predominantly white or very light gray—these can look bland on canvas unless there are strong accent colors to provide contrast.
For a gallery wall, it is important to think about how the colors in the chosen photos will work together. They do not need to match perfectly, but having some cohesive color elements helps create a unified look. This lesson is often learned the hard way when five canvases that individually look great end up clashing terribly when hung together.
Planning Your Canvas Size and Layout
This is where many people get stuck, and it is completely understandable. Walking into a frame shop and seeing dozens of size options can be dizzying. Add in the pressure of making sure everything looks proportional on the wall, and it is easy to see why people procrastinate on this step.
Measuring Your Wall Space Effectively
Before even thinking about canvas sizes, it is essential to grab a measuring tape and determine the available space. Professional designers suggest measuring the wall space first, then considering the furniture below it. A good rule ofthumb is that wall art should take up about 2/3 to 3/4 of the width of the furniture beneath it.
For example, for a 72-inch sofa, the canvas or canvas grouping should be roughly 48-54 inches wide. This creates a balanced look that does not feel too small or overwhelming. When hanging art on a blank wall without furniture below, there is more flexibility, but the scale of the room should still be considered.
Height matters too. Canvases are best hung so the center is at eye level, which is typically 57-60 inches from the floor. When creating a gallery wall, the center of the entire grouping should be at this height, not each individual piece.
Understanding Canvas Proportions and Aspect Ratios
Most phone photos are shot in a 4:3 or 16:9 aspect ratio, but canvas sizes often follow different proportions. This means the photo might need to be cropped to fit standard canvas sizes, or a custom size that matches the image’s natural proportions may be a better choice.
A common pitfall is forcing a panoramic landscape photo into a square canvas, which can result in a cramped and awkward composition. It is better to pay attention to the natural shape of the photos and choose canvas sizes that complement them rather than fighting against them.
Standard canvas sizes like 11×14, 16×20, and 20×30 work well for most applications. For those who are unsure, starting with these tried-and-true proportions is a safe bet. They are readily available, often more affordable than custom sizes, and tend to look balanced in most spaces.
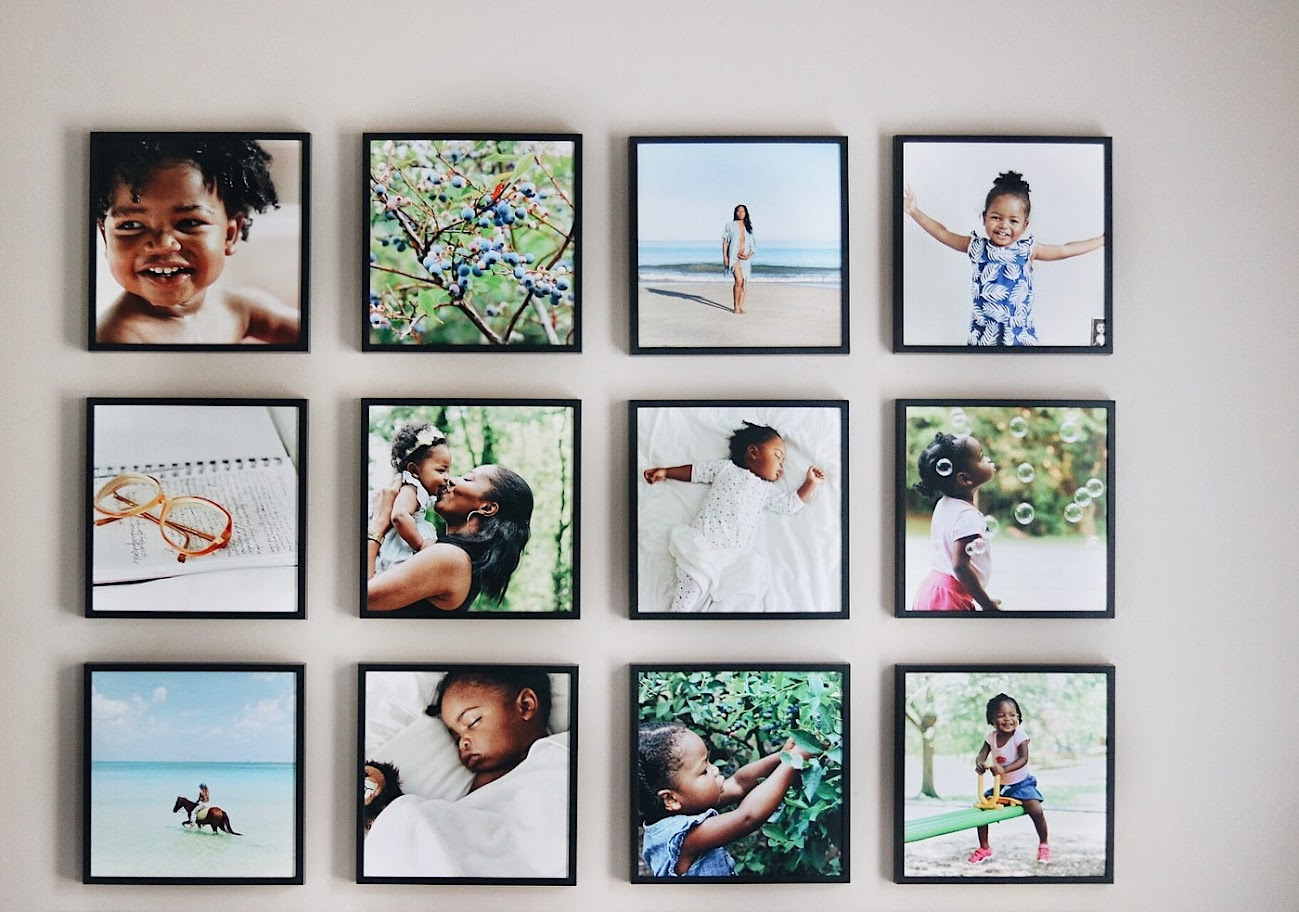
Creating Gallery Wall Layouts That Work
Gallery walls can look amazing, but they require some planning to avoid looking haphazard. A helpful technique is to cut paper templates in the sizes of the planned canvases and tape them to the wall. This allows for experimentation with different arrangements without putting holes in the wall.
The secret to a successful gallery wall is balance, not symmetry. Mix different sizes, but make sure the visual weight is distributed evenly. A good approach is to start with the largest piece and build around it, using smaller canvases to fill in gaps and create flow.
Leave 2-3 inches between canvases in a gallery wall grouping. Too much space makes the collection feel disconnected, while too little space makes it feel cluttered. If the display includes different types of art (canvas, framed prints, etc.), consistent spacing helps unify the different elements.
Traditional Canvas Options: Pros and Cons
The world of traditional canvas printing can feel complicated. Every print shop seems to offer different options, quality levels, and price points. While the results can be stunning, the process often comes with challenges that first-timers do not expect.
Stretched Canvas vs. Canvas Prints
Stretched canvas is what most people think of when they hear “canvas art”—the fabric is pulled tight over a wooden frame, creating that classic gallery look. The texture is beautiful, and the finished product feels substantial and professional. Stretched canvas looks wonderful, especially for larger pieces where the depth adds visual interest.
Canvas prints, on the other hand, are printed on canvas material but mounted on board or backing material instead of stretched over a frame. They are typically thinner and lighter, which can be an advantage if there are concerns about wall damage or weight limits.
The downside of stretched canvas is the commitment factor. These pieces are substantial, often heavy, and require proper hanging hardware. Once they are up, moving them is not a casual project. They also tend to be more expensive, especially in larger sizes.
Frame vs. Frameless Options
Frameless canvas (also called gallery wrap) has become increasingly popular for good reason. The image wraps around the edges of the canvas, creating a clean, modern look that works well in contemporary spaces. There is no frame to coordinate with decor, which simplifies the design process.
Framed canvas offers a more traditional look and can help protect the edges of the canvas from damage. For traditional decor or for coordinating canvas art with other framed pieces, this might be the better choice. However, frames add cost and complexity to the ordering process.


